-
How to create fogging and soft glow effects on pictures
By conversing so often with Brume (a fellow blogger whose username means mist), I had to write an article on her somehow. But which mist are we talking about? Well, here we'll only talk about enhancing your pictures with natural effects by adding some fog and/or soft glow. As always, I have used Paint Shop Pro X, but this tutorial can easily be adapted to any image editing software.
Materials
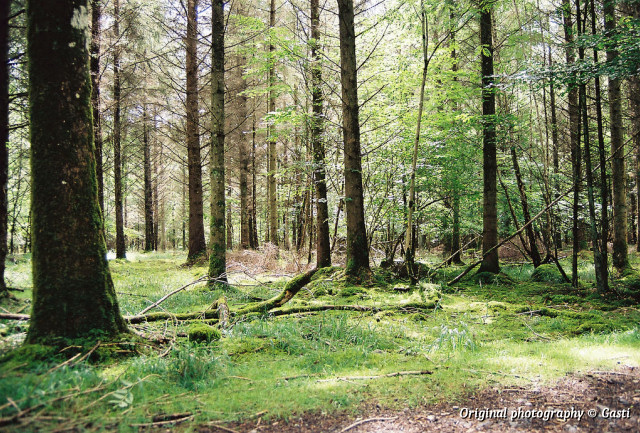
- a landscape photo
Instructions
1. Open a copy of the image you wish to manipulate.
2. Add a new layer and draw an irregularly shaped strip in the central part of the picture using the freehand selection tool with the following settings:
Feather = 45
Anti-alias activated3. Flood fill with white than select none.
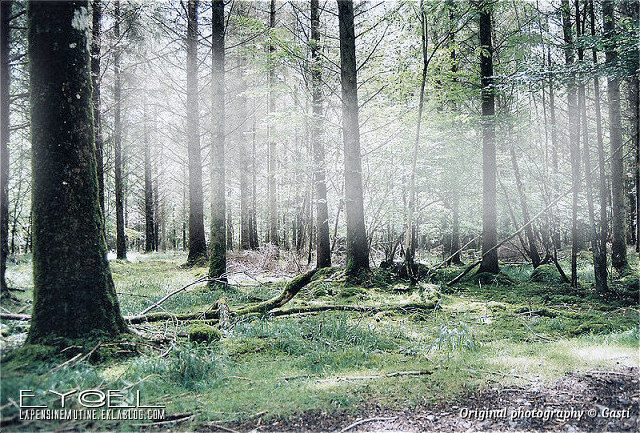
4. Now move the fog strip wherever you wish then lower the layer's opacity according to the desired effect (I lowed it to 68%).
NOTE: To make it look more real, I changed colour temperature to cooler tones (6780 K) and added up a bit of cyan to mid-tones, thus increasing the morning mist effect. Finally, to give a flawless finish, I slightly reduced colour saturation.
Click on each picture to enlarge
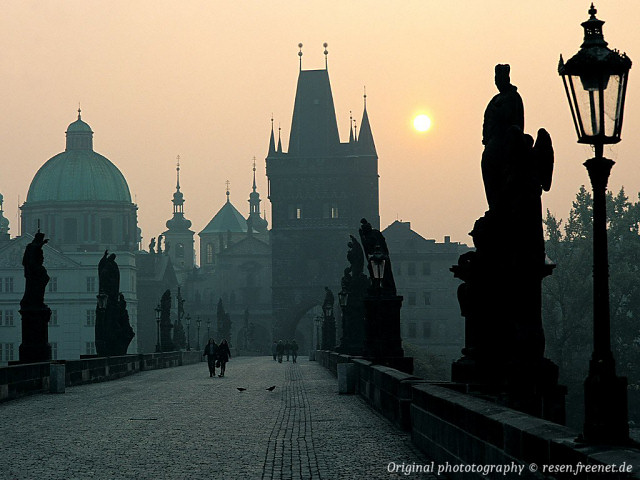
For the above variation, I used two different selections as shown on screen capture. The ground selection is to reflect the light. The layer opacity has been reduced by 20%. As for the mist itself, a feather of 60% has been used to draw the selection with a 42% layer opacity. Colours have also been altered. First by mapping hue 0 to 198 and hue 36 to 203 and decreasing saturation to minus 40%. Since sky saturation was still too blue, I used the Magic Wand tool to select it and further reduced its saturation to minus 40%.Click on each picture to enlarge

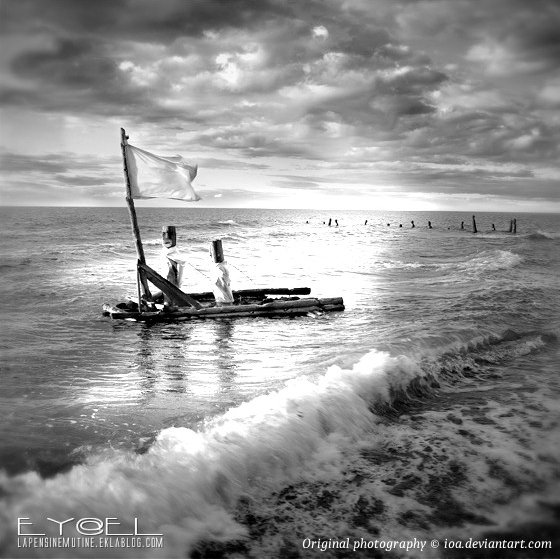
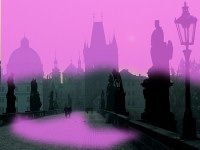
On this last sample, I only added soft glow which is particularly well suited to black and white pictures. As you can see on the left capture, I drew three selections. The first (magenta-purple) has the layer blend mode set to Dodge with 12% opacity. The second overlapping (cyan-purple) uses the same layer blend mode with 53% opacity. Finally, the last one (green) uses Lighten blend mode with 55% opacity.
As you can see, you need to adapt settings to each picture and your desired effect. Feel free to use as many layers as needed and experiment with blend modes to achieve optimal rendering. I have focused on “realistic” photo manipulation, but this technique may be used to produce “supernatural” or surreal effects. As always, the only limit is your own imagination.
Ey@el
Related articles
Reproduction of the above contents is strictly prohibited.
© lapensinemutine.eklablog.com. All rights reserved. Tags: tutorial, graphics, eyael
-
Comments
Thought repository for cluttered mind
-

My name is Eyael and I'm pleased to welcome you in my Pensieve. For an optimal brow-sing experience, here are some tools to effectively navigate:♦ Sitemap
♦ Ad blocker
♦ Newsletter
♦ RSS feedA quick word in my guestbook would also make me very happy!
You may also follow me on my social media:

Thank you,

STATISTICS
Online since: 06/08/2013
Articles 1320
Total visitors: 131210
Today: 86
Connected : 1