-
Animate pictures with water effects
There are many more or less satisfying techniques to animate pictures with waves, snow or rain, but in most cases it requires much skill and experience according to the tools used and the result is not always up to our expectations. Newbies rejoice: this tutorial should be easy for you to use provided you're both curious and willing to experiment. The free not-CPU intensive program I used runs only on Windows (XP/Vista/7/8?), but it also works fine on Wine for Linux users. Thanks for letting me know. To install, unzip the archive then double-click on the extracted file (you may need to be in Administrator Mode).
Materials
- a well-contrasted colour or black and white landscape picture with water
Instructions
1. Launch Sqirlz Water Reflections and open a copy of the image you wish to manipulate (green folder icon on the top toolbar or File - Open menu). In order to reduce the size of the animation, I advise you start with resized pictures according to the what you intend to do with the output.
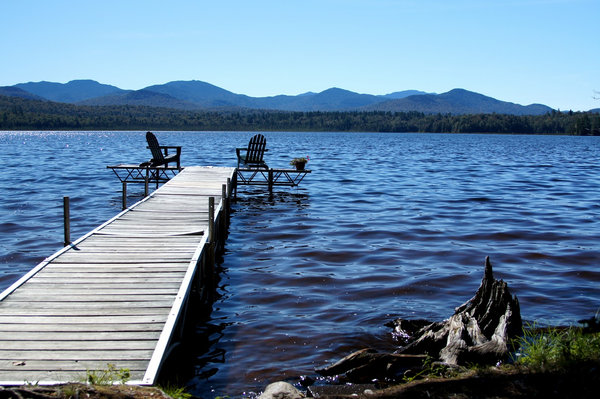
2. Magnify if necessary (CTRL++) and click on the Outline tool (red circle on the left toolbar) to start outlining the area you wish to animate. For the above picture, I selected the lake and some parts of the jetty for the output was ugly otherwise. Selecting them will simply make them disappear and the result is far more natural. To close the outline shaped when you're over, just right-click on the last point (this tool is quite similar to the Freehand tool featured in most image editing software).
3. I chose Basic Ripples so I had to set the parameters right to get what I want (Wave button on the top toolbar or Reflect Options - Customize Basic Ripples menu):Motion Type = A
Wave Strength = 50
Wave Separation = 14
Underwater Scene Rippling = 50
Perspective = 81
Blur = 0
Texture (Speckle) = 0
Transparency = 8
Wave Contrast = 50To preview the output without closing the dialog box, you may click on the yellow arrow (Run Basic Ripples Only) then click again to stop. You may also change the water colour, add extra waves, add flow or/and smooth the effect using the additional buttons, but some may slow down processing and produce a large file. However, you need to experiment to find out how this software works so be bold.
4. Now let's save the animation as an animated GIF (you may also chose to save it as an AVI or Flash file or to save frame individually to use with another image editing program. Click on the GIF icon on the top toolbar (or Animate - Make GIF File menu). A dialog box will open requesting to select your desired type of animation. I chose Basic Ripples Only. Click OK and enter the name and output filepath. Then you'll need to specify your desired framerate (Enter Frame Rate). This is the number of frames per second of your animation. The size of the output file will be proportional to that number. I chose 15, which is a good compromise between smooth motion and reasonable filesize.
NOTE: the default speed value (how long each frame will stay onscreen) is usually the best one but you may change it before making the GIF using the Animate - Period menu and increase or lower this value as you wish (with practice it'll be easier to guess the proper value to enter).Click on each picture to enlarge
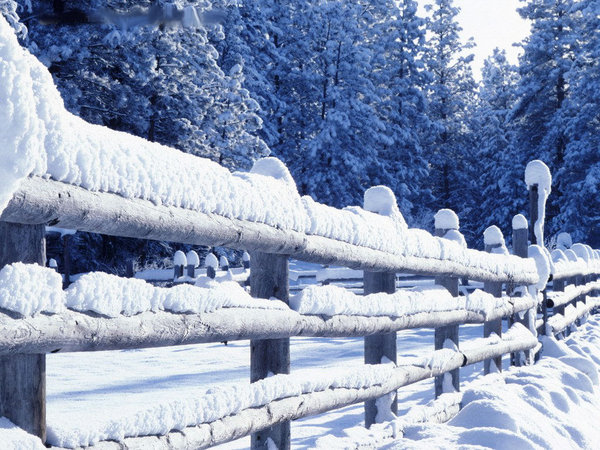
For the above snow effect, it was much easier. No need to outline anything. Just customise the Rain/Snow effect (rain button on the top toolbar) and then select Snow in the setting dialog. However you still have the possibility to outline a zone (e.g. select the inside of a window so that it is only snowing outside) and select Within Outline Only. Or you may wish to preserve the outlined zone (Avoid Outline). To export, check Rain/Snow only.
Click on each picture to enlarge
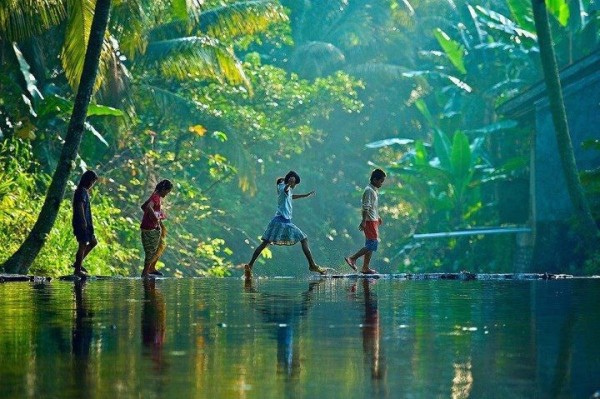
The above rain and ripples effect is a bit more difficult to obtain as it combines two effects and therefore a great deal of customisation. I started by outlining the rectangular water piece at the bottom of the picture and adjusted the settings for the rain effect as previously explained but didn't chose Snow nor the selection options. Then I used the Ring Ripples tool. To preview the combination of effects, I clicked on the yellow arrow on the top toolbar. Upon saving, I ticked Ring Ripples AND Rain/Snow.
Voilà. I hope you have fun and don't hesitate to experiment out of the box by animating not just landscapes but unusual items or letters. Since your imagination is the only limit, you won't run dry.Ey@el
Reproduction of the above contents is strictly prohibited.
© lapensinemutine.eklablog.com. All rights reserved. Tags: animation, graphics, tutorial, download, eyael
-
Comments
Thought repository for cluttered mind
-

My name is Eyael and I'm pleased to welcome you in my Pensieve. For an optimal brow-sing experience, here are some tools to effectively navigate:♦ Sitemap
♦ Ad blocker
♦ Newsletter
♦ RSS feedA quick word in my guestbook would also make me very happy!
You may also follow me on my social media:

Thank you,

STATISTICS
Online since: 06/08/2013
Articles 1320
Total visitors: 131524
Today: 59
Connected : 1